
Jun17


This oughta take the edge off!!


So, this post is interesting because we are taking a cake that is already fantastic and making it even more awesome.
The Luau Cake over at Bob Chinn’s Crab House is hands down one of the best desserts I’ve ever had. Light, airy and just the right amount of sweet.
After seeing a cute Pinterest pic of miniature luau cakes, we knew right away we had to give it a try!
We went and bought a whole Luau Cake from Bob Chinn’s and quickly got to work. The idea behind using a whole cake was so that we could make multiple mini cakes… Sharing, optional.


As if our Tiki wasn’t awesome enough… we have found a way to make it even cooler!!
Today, we are tricking out our Tiki mug! Ch-ch-ch-check it out….
What we used:
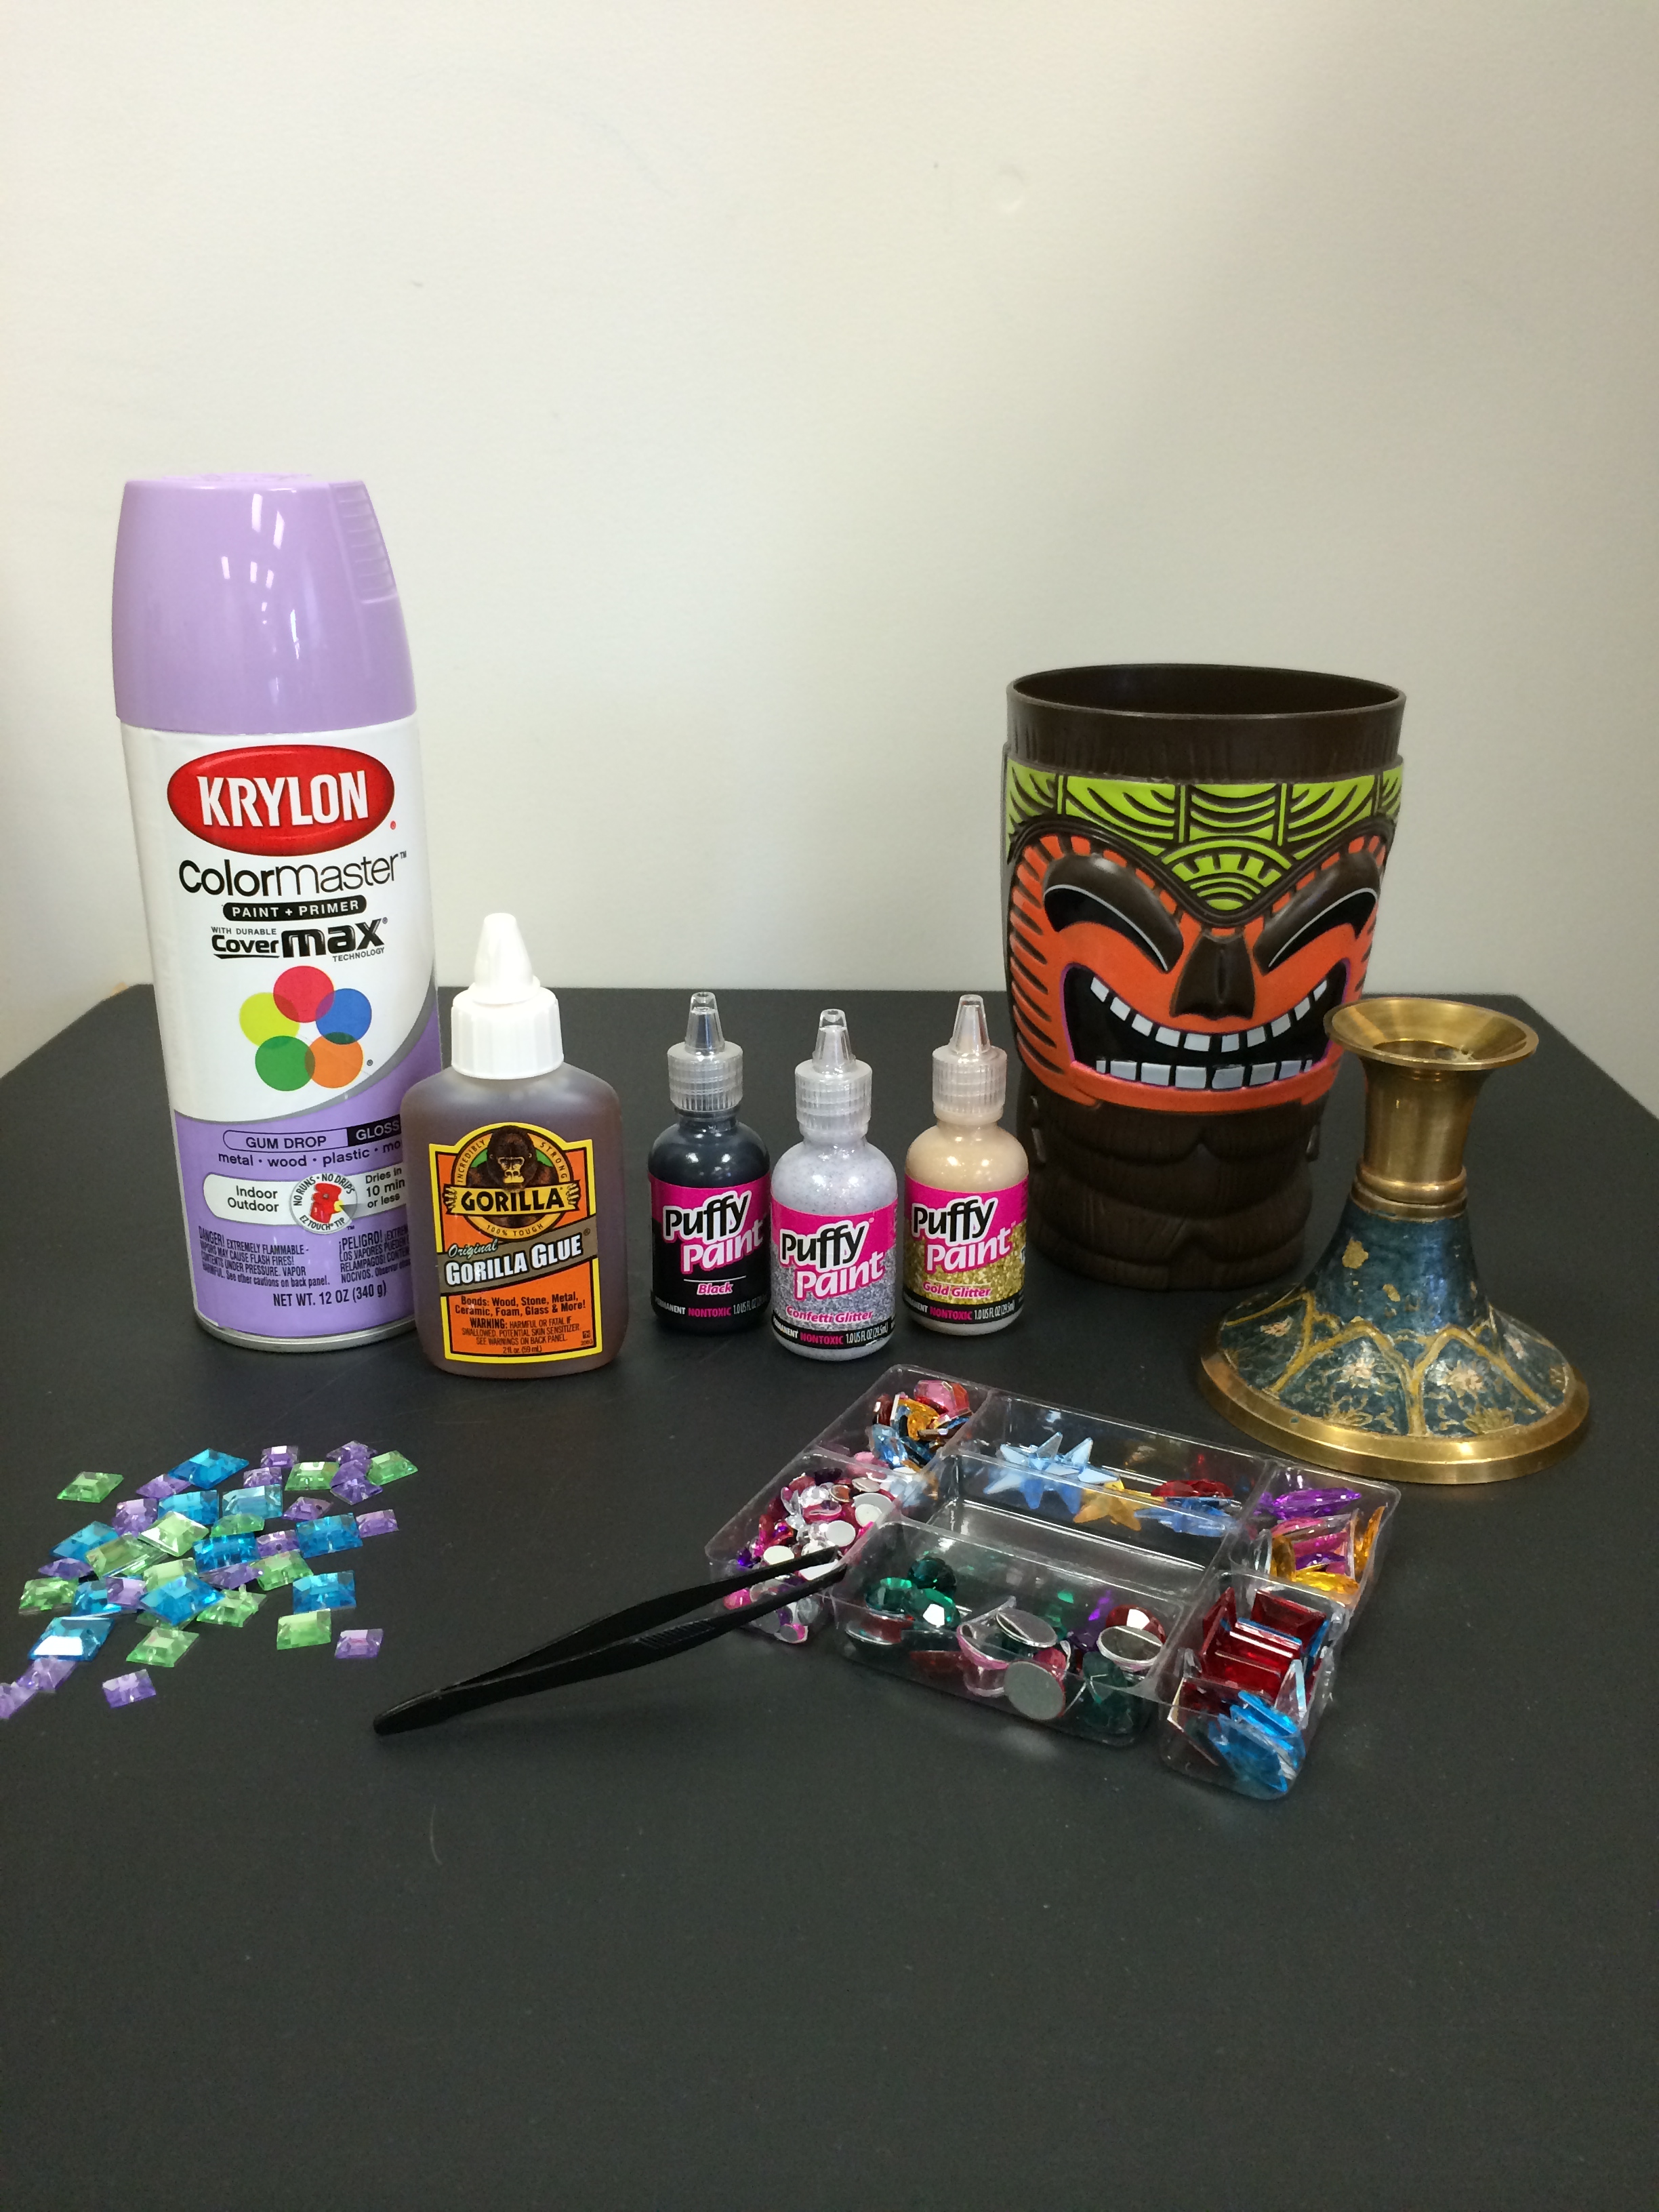
We started by spray painting the small candlestick holder (we got this one at Goodwill for next to nothing)

we should have used a primer before the paint, but hindsight is 20/20
After allowing the paint to dry, we used Gorilla Glue to adhere some flat-back bling onto the candlestick holder.

Then, using puff paint, we created a little pattern comprised of dots.

We left the masterpiece to dry overnight. The next morning, we lined the top ring of the holder with Gorilla Glue and set the Tiki on top.

I mean, how fun is this?!


Strolling past the nail salon and spotted this! Show us how you use your Mai Tai cup!


Greetings and Salutations, my little Easter bunnies! I know you all were scrambling to find something to tiki-fy your baskets this Sunday. Well, have we got a treat for you! Wait for it, wait for it… TIKI CHOCOLATES! After finding these cute tiki ice cube molds last summer at the dollar store, I knew frozen water wouldn’t do them justice. So, when in doubt, add chocolate to it! Okay, so that doesn’t rhyme, but it makes complete sense. Check out our yummy tutorial!
What you’ll need:


Following the directions (I know, even I surprise myself sometimes), we melted the chocolate (via microwave!!) and spooned it into the ice cube molds. If you want to get creative and do multiple colors, add a small amount of colored chocolate, then stick the molds into the freezer for about 30 minutes.

When the first candy layer is hardened, fill the mold with the desired chocolate color- throw it (well, don’t throw it, PLACE it) back in the freezer. We left ours overnight to ensure solidity. Placing a paper towel on a flat surface, we flipped the over and TAH DAH!

Almost too cute to eat!! ALMOST!


